by jhasensio

Month: January 2021

AVI for K8s Part 5: Deploying K8s secure Ingress type services

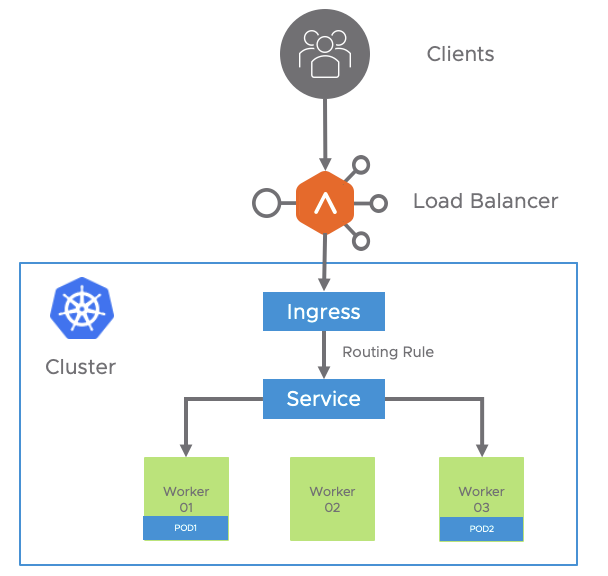
In that section we will focus on the secure ingress services which is the most common and sensible way to publish our service externally. As mentioned in previous sections the ingress is an object in kubernetes that can be used to provide load balancing, SSL termination and name-based virtual hosting. We will use the previous used hackazon application to continue with our tests but now we will move from HTTP to HTTPS for delivering the content.

Dealing with Securing Ingresses in K8s

We can modify the Ingress yaml file definition to turn the ingress into a secure ingress service by enabling TLS.

apiVersion: networking.k8s.io/v1beta1
kind: Ingress
metadata:
  name: hackazon
  labels:
    app: hackazon
spec:
  tls:
  - hosts:
    - hackazon.avi.iberia.local
    secretName: hackazon-secret
  rules:
    - host: hackazon.avi.iberia.local
      http:
        paths:
        - path: /
          backend:
            serviceName: hackazon
            servicePort: 80

There are some new items if we compare with an insecure ingress definition file we discussed in the previous section. Note how the spec contains a tls field that has some attributes including the hostname and also note there is a secretName definition. The rules section are pretty much the same as in the insecure ingress yaml file.

The secretName field must point to a new type of kubernetes object called secret. A secret in kubernetes is an object that contains a small amount of sensitive data such as a password, a token, or a key. There’s a specific type of secret that is used for storing a certificate and its associated cryptographic material that are typically used for TLS . This data is primarily used with TLS termination of the Ingress resource, but may be used with other resources or directly by a workload. When using this type of Secret, the tls.key and the tls.crt key must be provided in the data (or stringData) field of the Secret configuration, although the API server doesn’t actually validate the values for each key. To create a secret we can use the kubectl create secret command. The general syntax is showed below:

kubectl create secret tls my-tls-secret \
  --cert=path/to/cert/file \
  --key=path/to/key/file

The public/private key pair must exist before hand. The public key certificate for --cert must be .PEM encoded (Base64-encoded DER format), and match the given private key for --key. The private key must be in what is commonly called PEM private key format and unencrypted. We can easily generate a private key and a cert file by using OpenSSL tools. The first step is creating the private key. I will use an Elliptic Curve with a ecparam=prime256v1. For more information about eliptic curve key criptography click here

openssl ecparam -name prime256v1 -genkey -noout -out hackazon.key

The contents of the created hackazon.key file should look like this:

-----BEGIN EC PRIVATE KEY-----
MHcCAQEEIGXaF7F+RI4CU0MHa3MbI6fOxp1PvxhS2nxBEWW0EOzJoAoGCCqGSM49AwEHoUQDQgAE0gO2ZeHeZWBiPdOFParWH6Jk15ITH5hNzy0kC3Bn6yerTFqiPwF0aleSVXF5JAUFxJYNo3TKP4HTyEEvgZ51Q==
-----END EC PRIVATE KEY-----

In the second step we will create a Certificate Signing Request (CSR). We need to speciify the certificate paremeters we want to include in the public facing certificate. We will use a single line command to create the csr request. The CSR is the method to request a public key given an existing private key so, as you can imagine, we have to include the hackazon.key file to generate the CSR.

openssl req -new -key hackazon.key -out hackazon.csr -subj "/C=ES/ST=Madrid/L=Pozuelo/O=Iberia Lab/OU=Iberia/CN=hackazon.avi.iberia.local"

The content of the created hackazon.csr file should look like this:

-----BEGIN CERTIFICATE REQUEST-----
MIIBNjCB3AIBADB6MQswCQYDVQQGEwJFUzEPMA0GA1UECAwGTWFkcmlkMRAwDgYDVQQHDAdQb3p1ZWxvMRMwEQYDVQQKDApJYmVyaWEgTGFiMQ8wDQYDVQQLDAZJYmVyaWExIjAgBgNVBAMMGWhhY2them9uLmF2aS5pYmVyaWEubG9jYWwwWTATBgcqhkjOPQIBBggqhkjOPQMBBwNCAATSA7Zl4d5lYGI904U9qtYfomTXkhMfmE3PLSTMLcGfrJ6tMWqI/AXRqV5JVcXkkBQXElg2jdMo/gdPIQS+BnnVoAAwCgYIKoZIzj0EAwIDSQAwRgIhAKt5AvKJ/DvxYcgUQZHK5d7lIYLYOULIWxnVPiKGNFuGAiEA3Ul99dXqon+OGoKBTujAHpOw8SA/Too1Redgd6q8wCw=
-----END CERTIFICATE REQUEST-----

Next, we need to sign the CSR. For a production environment is highly recommended to use a public Certification Authority to sign the request. For lab purposes we will self-signed the CSR using the private file created before.

openssl x509 -req -days 365 -in hackazon.csr -signkey hackazon.key -out hackazon.crt
Signature ok
subject=C = ES, ST = Madrid, L = Pozuelo, O = Iberia Lab, OU = Iberia, CN = hackazon.avi.iberia.local
Getting Private key

The output file hackazon.crt contains the new certificate encoded in PEM Base66 and it should look like this:

-----BEGIN CERTIFICATE-----
MIIB7jCCAZUCFDPolIQwTC0ZFdlOc/mkAZpqVpQqMAoGCCqGSM49BAMCMHoxCzAJBgNVBAYTAkVTMQ8wDQYDVQQIDAZNYWRyaWQxEDAOBgNVBAcMB1BvenVlbG8xEzARBgNVBAoMCkliZXJpYSBMYWIxDzANBgNVBAsMBkliZXJpYTEiMCAGA1UEAwwZaGFja2F6b24uYXZpLmliZXJpYS5sb2NhbDAeFw0yMDEyMTQxODExNTdaFw0yMTEyMTQxODExNTdaMHoxCzAJBgNVBAYTAkVTMQ8wDQYDVQQIDAZNYWRyaWQxEDAOBgNVBAcMB1BvenVlbG8xEzARBgNVBAoMCkliZXJpYSBMYWIxDzANBgNVBAsMBkliZXJpYTEiMCAGA1UEAwwZaGFja2F6b24uYXZpLmliZXJpYS5sb2NhbDBZMBMGByqGSM49AgEGCCqGSM49AwEHA0IABNIDtmXh3mVgYj3ThT2q1h+iZNeSEx+YTc8tJMwtwZ+snq0xaoj8BdGpXklVxeSQFBcSWDaN0yj+B08hBL4GedUwCgYIKoZIzj0EAwIDRwAwRAIgcLjFh0OBm4+3CYekcSG86vzv7P0Pf8Vm+y73LjPHg3sCIH4EfNZ73z28GiSQg3n80GynzxMEGG818sbZcIUphfo+
-----END CERTIFICATE-----

We can also decode the content of the X509 certificate by using the openssl tools to check if it actually match with our subject definition.

openssl x509 -in hackazon.crt -text -noout
Certificate:
    Data:
        Version: 1 (0x0)
        Serial Number:
            33:e8:94:84:30:4c:2d:19:15:d9:4e:73:f9:a4:01:9a:6a:56:94:2a
        Signature Algorithm: ecdsa-with-SHA256
        Issuer: C = ES, ST = Madrid, L = Pozuelo, O = Iberia Lab, OU = Iberia, CN = hackazon.avi.iberia.local
        Validity
            Not Before: Dec 14 18:11:57 2020 GMT
            Not After : Dec 14 18:11:57 2021 GMT
        Subject: C = ES, ST = Madrid, L = Pozuelo, O = Iberia Lab, OU = Iberia, CN = hackazon.avi.iberia.local
        Subject Public Key Info:
            Public Key Algorithm: id-ecPublicKey
                Public-Key: (256 bit)
                pub:
                    04:d2:03:b6:65:e1:de:65:60:62:3d:d3:85:3d:aa:
                    d6:1f:a2:64:d7:92:13:1f:98:4d:cf:2d:24:cc:2d:
                    c1:9f:ac:9e:ad:31:6a:88:fc:05:d1:a9:5e:49:55:
                    c5:e4:90:14:17:12:58:36:8d:d3:28:fe:07:4f:21:
                    04:be:06:79:d5
                ASN1 OID: prime256v1
                NIST CURVE: P-256
    Signature Algorithm: ecdsa-with-SHA256
         30:44:02:20:70:b8:c5:87:43:81:9b:8f:b7:09:87:a4:71:21:
         bc:ea:fc:ef:ec:fd:0f:7f:c5:66:fb:2e:f7:2e:33:c7:83:7b:
         02:20:7e:04:7c:d6:7b:df:3d:bc:1a:24:90:83:79:fc:d0:6c:
         a7:cf:13:04:18:6f:35:f2:c6:d9:70:85:29:85:fa:3e

Finally once we have the cryptographic material created, we can go ahead and create the secret object we need using regular kubectl command line. In our case we will create a new tls secret that we will call hackazon-secret using our newly created cert and private key files.

kubectl create secret tls hackazon-secret --cert hackazon.crt --key hackazon.key
secret/hackazon-secret created

I have created a simple but useful script available here that puts all this steps together. You can copy the script and customize it at your convenience. Make it executable and invoke it simply adding a friendly name, the subject and the namespace as input parameters. The script will make all the job for you.

./create-secret.sh my-site /C=ES/ST=Madrid/CN=my-site.example.com default
      
      Step 1.- EC Prime256 v1 private key generated and saved as my-site.key

      Step 2.- Certificate Signing Request created for CN=/C=ES/ST=Madrid/CN=my-site.example.com
Signature ok
subject=C = ES, ST = Madrid, CN = my-site.example.com
Getting Private key

      Step 3.- X.509 certificated created for 365 days and stored as my-site.crt

secret "my-site-secret" deleted
secret/my-site-secret created
      
      Step 4.- A TLS secret named my-site-secret has been created in current context and default namespace

Certificate:
    Data:
        Version: 1 (0x0)
        Serial Number:
            56:3e:cc:6d:4c:d5:10:e0:99:34:66:b9:3c:86:62:ac:7e:3f:3f:63
        Signature Algorithm: ecdsa-with-SHA256
        Issuer: C = ES, ST = Madrid, CN = my-site.example.com
        Validity
            Not Before: Dec 16 15:40:19 2020 GMT
            Not After : Dec 16 15:40:19 2021 GMT
        Subject: C = ES, ST = Madrid, CN = my-site.example.com
        Subject Public Key Info:
            Public Key Algorithm: id-ecPublicKey
                Public-Key: (256 bit)
                pub:
                    04:6d:7b:0e:3d:8a:18:af:fc:91:8e:16:7b:15:81:
                    0d:e5:68:17:80:9f:99:85:84:4d:df:bc:ae:12:9e:
                    f4:4a:de:00:85:c1:7e:69:c0:58:9a:be:90:ff:b2:
                    67:dc:37:0d:26:ae:3e:19:73:78:c2:11:11:03:e2:
                    96:61:80:c3:77
                ASN1 OID: prime256v1
                NIST CURVE: P-256
    Signature Algorithm: ecdsa-with-SHA256
         30:45:02:20:38:c9:c9:9b:bc:1e:5c:7b:ae:bd:94:17:0e:eb:
         e2:6f:eb:89:25:0b:bf:3d:c9:b3:53:c3:a7:1b:9c:3e:99:28:
         02:21:00:f5:56:b3:d3:8b:93:26:f2:d4:05:83:9d:e9:15:46:
         02:a7:67:57:3e:2a:9f:2c:be:66:50:82:bc:e8:b7:c0:b8

Once created we can see the new object using the Octant GUI as displayed below:

We can also the display the yaml defintion for that particular secret if required

Once we have the secret ready to use, let’s apply the secure ingress yaml file definition. The full yaml including the Deployment and the ClusterIP service definition can be accesed here.

kubectl apply -f hackazon_secure_ingress.yaml

As soon as the yaml file is pushed to the kubernetes API, the AKO will translate this ingress configuration into API calls to the AVI controller in order to realize the different configuration elements in external Load Balancer. That also includes the uploading of the secret k8s resource that we created before in the form of a new certificate that will be used to secure the traffic directed to this Virtual Service. This time we have changed the debugging level of AKO to DEBUG. This outputs humongous amount of information. I have selected some key messages that will help us to understand what is happening under the hood.

Exploring AKO Logs for Secure Ingress Creation

# An HTTP to HTTPS Redirection Policy has been created and attached to the parent Shared L7 Virtual service
2020-12-16T11:16:38.337Z        DEBUG   rest/dequeue_nodes.go:1213      The HTTP Policies rest_op is [{"Path":"/api/macro","Method":"POST","Obj":{"model_name":"HTTPPolicySet","data":{"cloud_config_cksum":"2197663401","created_by":"ako-S1-AZ1","http_request_policy":{"rules":[{"enable":true,"index":0,"match":{"host_hdr":{"match_criteria":"HDR_EQUALS","value":["hackazon.avi.iberia.local"]},"vs_port":{"match_criteria":"IS_IN","ports":[80]}},"name":"S1-AZ1--Shared-L7-0-0","redirect_action":{"port":443,"protocol":"HTTPS","status_code":"HTTP_REDIRECT_STATUS_CODE_302"}}]},"name":"S1-AZ1--Shared-L7-0","tenant_ref":"/api/tenant/?name=admin"}},"Tenant":"admin","PatchOp":"","Response":null,"Err":null,"Model":"HTTPPolicySet","Version":"20.1.2","ObjName":""}

# The new object is being created. The certificate and private key is uploaded to the AVI Controller. The yaml contents are parsed to create the API POST call
2020-12-16T11:16:39.238Z        DEBUG   rest/dequeue_nodes.go:1213      The HTTP Policies rest_op is [{"Path":"/api/macro","Method":"POST","Obj":{"model_name":"SSLKeyAndCertificate","data":{"certificate":{"certificate":"-----BEGIN CERTIFICATE-----\nMIIB7jCCAZUCFDPolIQwTC0ZFdlOc/mkAZpqVpQqMAoGCCqGSM49BAMCMHoxCzAJ\nBgNVBAYTAkVTMQ8wDQYDVQQIDAZNYWRyaWQxEDAOBgNVBAcMB1BvenVlbG8xEzAR\nBgNVBAoMCkliZXJpYSBMYWIxDzANBgNVBAsMBkliZXJpYTEiMCAGA1UEAwwZaGFj\na2F6b24uYXZpLmliZXJpYS5sb2NhbDAeFw0yMDEyMTQxODExNTdaFw0yMTEyMTQx\nODExNTdaMHoxCzAJBgNVBAYTAkVTMQ8wDQYDVQQIDAZNYWRyaWQxEDAOBgNVBAcM\nB1BvenVlbG8xEzARBgNVBAoMCkliZXJpYSBMYWIxDzANBgNVBAsMBkliZXJpYTEi\nMCAGA1UEAwwZaGFja2F6b24uYXZpLmliZXJpYS5sb2NhbDBZMBMGByqGSM49AgEG\nCCqGSM49AwEHA0IABNIDtmXh3mVgYj3ThT2q1h+iZNeSEx+YTc8tJMwtwZ+snq0x\naoj8BdGpXklVxeSQFBcSWDaN0yj+B08hBL4GedUwCgYIKoZIzj0EAwIDRwAwRAIg\ncLjFh0OBm4+3CYekcSG86vzv7P0Pf8Vm+y73LjPHg3sCIH4EfNZ73z28GiSQg3n8\n0GynzxMEGG818sbZcIUphfo+\n-----END CERTIFICATE-----\n"},"created_by":"ako-S1-AZ1","key":"-----BEGIN EC PRIVATE KEY-----\nMHcCAQEEIGXaF7F+RI4CU0MHa3MbI6fOxp1PvxhS2nxBEWW0EOzJoAoGCCqGSM49\nAwEHoUQDQgAE0gO2ZeHeZWBiPdOFParWH6Jk15ITH5hNzy0kzC3Bn6yerTFqiPwF\n0aleSVXF5JAUFxJYNo3TKP4HTyEEvgZ51Q==\n-----END EC PRIVATE KEY-----\n","name":"S1-AZ1--hackazon.avi.iberia.local","tenant_ref":"/api/tenant/?name=admin","type":"SSL_CERTIFICATE_TYPE_VIRTUALSERVICE"}},"Tenant":"admin","PatchOp":"","Response":null,"Err":null,"Model":"SSLKeyAndCertificate","Version":"20.1.2","ObjName":""},{"Path":"/api/macro","Method":"POST","Obj":{"model_name":"Pool","data":{"cloud_config_cksum":"1651865681","cloud_ref":"/api/cloud?name=Default-Cloud","created_by":"ako-S1-AZ1","health_monitor_refs":["/api/healthmonitor/?name=System-TCP"],"name":"S1-AZ1--default-hackazon.avi.iberia.local_-hackazon","service_metadata":"{\"namespace_ingress_name\":null,\"ingress_name\":\"hackazon\",\"namespace\":\"default\",\"hostnames\":[\"hackazon.avi.iberia.local\"],\"svc_name\":\"\",\"crd_status\":{\"type\":\"\",\"value\":\"\",\"status\":\"\"},\"pool_ratio\":0,\"passthrough_parent_ref\":\"\",\"passthrough_child_ref\":\"\"}","sni_enabled":false,"ssl_profile_ref":"","tenant_ref":"/api/tenant/?name=admin","vrf_ref":"/api/vrfcontext?name=VRF_AZ1"}},"Tenant":"admin","PatchOp":"","Response":null,"Err":null,"Model":"Pool","Version":"20.1.2","ObjName":""},{"Path":"/api/macro","Method":"POST","Obj":{"model_name":"PoolGroup","data":{"cloud_config_cksum":"2962814122","cloud_ref":"/api/cloud?name=Default-Cloud","created_by":"ako-S1-AZ1","implicit_priority_labels":false,"members":[{"pool_ref":"/api/pool?name=S1-AZ1--default-hackazon.avi.iberia.local_-hackazon","ratio":100}],"name":"S1-AZ1--default-hackazon.avi.iberia.local_-hackazon","tenant_ref":"/api/tenant/?name=admin"}},"Tenant":"admin","PatchOp":"","Response":null,"Err":null,"Model":"PoolGroup","Version":"20.1.2","ObjName":""},

# An HTTP Policy is defined to allow the requests with a Header matching the Host field hackazon.iberia.local in the / path to be swithed towards to the corresponding pool
{"Path":"/api/macro","Method":"POST","Obj":{"model_name":"HTTPPolicySet","data":{"cloud_config_cksum":"1191528635","created_by":"ako-S1-AZ1","http_request_policy":{"rules":[{"enable":true,"index":0,"match":{"host_hdr":{"match_criteria":"HDR_EQUALS","value":["hackazon.avi.iberia.local"]},"path":{"match_criteria":"BEGINS_WITH","match_str":["/"]}},"name":"S1-AZ1--default-hackazon.avi.iberia.local_-hackazon-0","switching_action":{"action":"HTTP_SWITCHING_SELECT_POOLGROUP","pool_group_ref":"/api/poolgroup/?name=S1-AZ1--default-hackazon.avi.iberia.local_-hackazon"}}]},"name":"S1-AZ1--default-hackazon.avi.iberia.local_-hackazon","tenant_ref":"/api/tenant/?name=admin"}},"Tenant":"admin","PatchOp":"","Response":null,"Err":null,"Model":"HTTPPolicySet","Version":"20.1.2","ObjName":""}]

If we take a look to the AVI GUI we can notice the new elements that has been realized to create the desired configuration.

Exploring Secure Ingress realization at AVI GUI

First of all AVI represent the secure ingress object as an independent Virtual Service. Actually AKO creates an SNI child virtual service with the name S1-AZ1–hackazon.avi.iberia.local linked to parent shared virtual service S1-AZ1-Shared-L7-0 to represent the new secure hostname. The SNI virtual service is used to bind the hostname to an sslkeycert object. The sslkeycert object is used to terminate the secure traffic on the AVI service engine. In our above example the secretName field points to the secret hackazon-secret that is asssociated with the hostname hackazon.avi.iberia.local. AKO parses the attached secret object and appropriately creates the sslkeycert object in Avi. Note that the SNI virtual service does not get created if the secret object does not exist in a form of a secret Kubernetes resource.

From Dashboard, If we click on the virtual service and then if we hover on the Virtual Service we can see some of the properties that has been attached to our secure Virtual Service object. For example note the SSL associated certicate is S1-AZ1–hackazon.avi.iberia.local, there is also a HTTP Request Policy with 1 rule that has been automically added upon ingress creation.

If we click on the pencil icon we can see how this new Virtual Service object is a Child object whose parent object corresponds to S1-AZ1–Shared-L7-0 as mentioned before.

We can also verify how the SSL Certificate attached corresponds to the new created object pushed from AKO as we show in the debugging trace before.

If we go to Templates > Security > SSL/TLS Certificates we can open the new created certificate and even click on export to explore the private key and the certificate.

If we compare the key and the certificate with our generated private key and certificate it must be identical.

AKO creates also a HTTPpolicyset rule to route the terminated traffic to the appropate pool that corresponds to the host/path specifies in the rules section of our Ingress object. If we go Policies > HTTP Request we can see a rule applied to our Virtual Service with a matching section that will find a match if the Host header HTTP header AND the path of the URL begins with “/”. If this is the case the request will be directed to the Pool Group S1-AZ1–default-hackazon.avi.iberia.local_-hackazon that contains the endpoints (pods) that has been created in our k8s deployment.

As a bonus, AKO also creates for us a useful HTTP to HTTPS redirection policy on the shared virtual service (parent to the SNI child) for this specific secure hostname to avoid any clear-text traffic flowing in the network. This produces at the client browser an automatic redirection of an originating HTTP (tcp port 80) requests to HTTPS (tcp port 443) if they are accessed on the insecure port.

Capturing traffic to disect SSL transaction

The full sequence of events trigered (excluding DNS resolution) from a client that initiates a request to the non secure service at http://hackazon.avi.iberia.local is represented in the following sequence diagram.

To see how this happen from an end user perspective just try to access the virtual service using the insecure port (TCP 80) at the URL http://hackazon.avi.iberia.local with a browser. We can see how our request is automatically redirected to the secure port (TCP 443) at https://hackazon.avi.iberia.local. The Certificate Warning appears indicating that the used certificate cannot be verified by our local browser unless we add this self-signed certificate to a local certificate store.

Unsafe Certificate Warning Message

If we proceed to the site, we can open the certificate used to encrypt the connection and you can identify all the parameters that we used to create the k8s secret object.

A capture of the traffic from the client will show how the HTTP to HTTPS redirection policy is implemented using a 302 Moved Temporarily HTTP code that will instruct our browser to redirect the request to an alternate URI located at https://hackazon.avi.iberia.local

The first packet that start the TLS Negotiation is the Client Hello. The browser uses an extension of the TLS protocol called Server Name Indication (SNI) that is commonly used and widely supported and allows the terminating device (in this case the Load Balancer) to select the appropiate certificate to secure the TLS channel and also to route the request to the desired associated virtual service. In our case the TLS negotiation uses hackazon.avi.iberia.local as SNI. This allows the AVI Service Engine to route the subsequent HTTPS requests after TLS negotiation completion to the right SNI Child Virtual Service.

If we explore the logs generated by our connection we can see the HTTPS headers that also shows the SNI Hostname (left section of image below) received from the client as well as other relevant parameters. If we capture this traffic from the customer we won’t be able to see this headers since they are encrypted inside the TLS payload. AVI is able to decode and see inside the payload because is terminating the TLS connection acting as a proxy.

As you can notice, AVI provide a very rich analytics natively, however if we need even more deeper visitility, AVI has the option to fully capture the traffic as seen by the Service Engines. We can access from Operations > Traffic Capture.
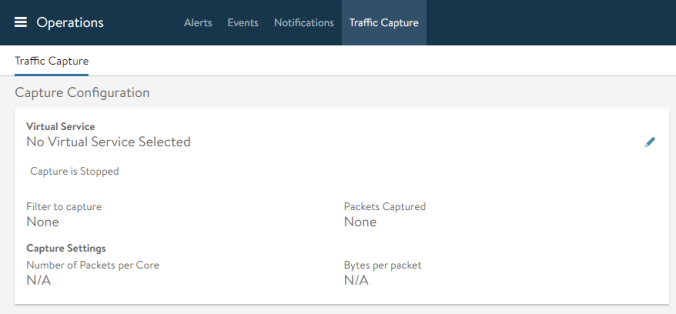
Click pencil and select virtual service, set the Size of Packets to zero to capture the full packet length and also make sure the Capture Session Key is checked. Then click Start Capture at the bottom of the window.

If we generate traffic from our browser we can see how the packet counter increases. We can stop the capture at any time just clicking on the green slider icon.

The capture is being prepared and, after a few seconds (depending on the size of the capture) the capture would be ready to download.
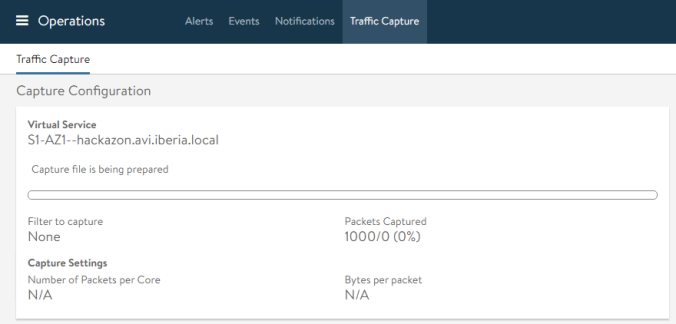
When done, click on the download icon at the right to download the capture file

The capture is a tar file that includes two files: a pcapng file that contains the traffic capture and a txt file that includes the key of the session and will allow us to decrypt the payload of the TLS packet. You can use the popular wireshark to open the capture. We need to specifiy the key file to wireshark prior to openeing the capture file. If using the wireshark version for MacOS simply go to Wireshark > Preferences. Then in the Preferences windows select TLS under the protocol menu and browse to select the key txt file for our capture.

Once selected, click ok and we can now open the capture pcapng file and locate one of the TLS1.2 packets in the displayed capture…

At the bottom of the screen note how the Decrypte TLS option appears

Now we can see in the bottom pane some decrypted information that in this case seems to be an HTTP 200 OK response that contains some readable headers.

An easier way to see the contents of the TLS is using the Follow > TLS Stream option. Just select one of the TLS packets and right click to show the contextual menu.

We can now see the full converation in a single window. Note how the HTTP Headers that are part of the TLS payload are now fully readable. Also note that the Body section of the HTTP packet has been encoded using gzip. This is the reason we cannot read the contents of this particular section.

If you have interest in unzipping the Body section of the packet to see its content just go to File > Export Objects > HTTP and locate the packet number of your interest. Note that now, the content type that appears is the uncompressed content type, so e.g text/html, and not gzip.

Now we have seen how to create secure Ingress K8s services using AKO in a single kubernetes cluster. It’s time to explore beyond the local cluster and moving to the next level looking for multicluster services.

AVI for K8s Part 4: Deploying AVI K8s insecure Ingress Type Services

Introducing the Ingress Object

In that section we will focus on an specific K8s resource called Ingress. The ingress is just another k8s object that manages external access to the services in a cluster, typically HTTP(S). The ingress resource exposes HTTP and HTTPS routes from outside the cluster and points to services within the cluster. Traffic routing is controlled by rules that are defined as part of the ingress specification.

An Ingress may be configured to provide k8s-deployed applications with externally-reachable URLs, load balance traffic, terminate SSL / TLS, and offer name-based virtual hosting. The ingress controller (AKO in our case) is is responsible for fulfilling the Ingress with the external AVI Service Engines to help handle the traffic. An Ingress service does not expose arbitrary ports or protocols and is always related to HTTP/HTTPS traffic. Exposing services other than HTTP/HTTPS like a Database or a Syslog service to the internet tipically uses a service of type NodePort or LoadBalancer.

To create the ingress we will use a declarative yaml file instead of kubectl imperative commands this is time since is the usual way in a production environment and give us the chance to understand and modify the service definition just by changing the yaml plain text. In this case I am using Kubernetes 1.18 and this is how a typical ingress definition looks like:

apiVersion: networking.k8s.io/v1beta1
kind: Ingress
metadata:
  name: myservice
spec:
  rules:
  - host: myservice.example.com
    http:
      paths:
      - path: /
        backend:
          serviceName: myservice
          servicePort: 80

As with other kubernetes declarative file, we need apiVersion, kind and metadata to define the resource. The ingress spec will contain all the information rules needed to configure our AVI Load Balancer, in this case the protocol http, the name of the host (must be a resolvable DNS name) and the routing information such as the path and the backend that is actually terminating the traffic.

AKO needs a service of type ClusterIP (default service type) acting as backend to send the ingress requests to. In a similar way the deployment and the service k8s resources can be also defined declaratively by using a corresponding yaml file. Let’s define a deployment of an application called hackazon. Hackazon is an intentionally vulnerable machine that pretends to be an online store and that incorporates some technologies that are currently used: an AJAX interface, a realistic e-commerce workflow and even a RESTful API for a mobile application. The deployment and service definition will look like this:

apiVersion: apps/v1
kind: Deployment
metadata:
  name: hackazon
  labels:
    app: hackazon
spec:
  replicas: 3
  selector:
    matchLabels:
      app: hackazon
  template:
    metadata:
      labels:
        app: hackazon
    spec:
      containers:
        - image: mutzel/all-in-one-hackazon:postinstall
          name: hackazon
          ports:
            - containerPort: 80
              name: http
---
apiVersion: v1
kind: Service
metadata:
  name: hackazon
spec:
  selector:
    app: hackazon
  ports:
  - port: 80
    targetPort: 80

As you can see above, in a single file we are describing the Deployment with several configuration elements such as the number of replicas, the container image we are deploying, the port… etc. Also at the bottom of the file you can see the Service definition that will create an abstraction called ClusterIP that will represent the set of pods under the hackazon deployment.

Once the yaml file is created we can launch the configuration by using kubectl apply command.

kubectl apply -f hackazon_deployment_service.yaml
deployment.apps/hackazon created
service/hackazon created

Now we can check the status of our services using kubectl get commands to verify what objects has been created in our cluster. Note that the Cluster IP is using an internal IP address and it’s only reachable internally.

kubectl get pods
NAME                       READY   STATUS    RESTARTS   AGE
hackazon-b94df7bdc-4d7bd   1/1     Running   0          66s
hackazon-b94df7bdc-9pcxq   1/1     Running   0          66s
hackazon-b94df7bdc-h2dm4   1/1     Running   0          66s

kubectl get services
NAME         TYPE        CLUSTER-IP    EXTERNAL-IP   PORT(S)       AGE
hackazon     ClusterIP   10.99.75.86   <none>        80/TCP      78s

At this point I would like to introduce, just to add some extra fun, an interesting graphical tool for kubernetes cluster management called Octant that can be easily deployed and is freely available at https://github.com/vmware-tanzu/octant. Octant can be easily installed in the OS of your choice. Before using it you need to have access to a healthy k8s cluster. You can check it by using the cluster-info command. The output should show something like this:

kubectl cluster-info                                      
Kubernetes master is running at https://10.10.24.160:6443
KubeDNS is running at https://10.10.24.160:6443/api/v1/namespaces/kube-system/services/kube-dns:dns/proxy

To further debug and diagnose cluster problems, use 'kubectl cluster-info dump'.

Using Octant as K8s dashboard

Once the above requirement is fulfilled you just need to install and execute octant using the instructions provided in the octant website. The tool is accesed via web at http://127.0.0.1:7777. You can easily check the Deployment, Pods and ReplicaSets status from Workloads > Overview

Octant dashboard showing K8s workload information in a graphical UI

And also you can verify the status of the ClusterIP service we have created from Discovery and Load Balancing > Services

Octant dashboard showing K8s services

Once Octant is deployed, let’s move to the ingress service. In that case we will use the following yaml file to declare the ingress service that will expose our application.

apiVersion: networking.k8s.io/v1beta1
kind: Ingress
metadata:
  name: hackazon
  labels:
    app: hackazon
spec:
  rules:
    - host: hackazon.avi.iberia.local
      http:
        paths:
        - path: /
          backend:
            serviceName: hackazon
            servicePort: 80

I will use the Apply YAML option at the top bar of the Octant Interface to push the configuration into the K8s API. When we press the Apply button a message confirming an Ingress service has been created appears as a top bar in the foreground screen of the UI.

Octant Ingress YAML

After applying, we can see how our new Ingress object has been created and, as you can see, our AKO integration must have worked since we have an external IP address assigned of the our frontend subnet at 10.10.25.46 which is an indication of sucessfull dialogue between AKO controller and the API endpoint of the AVI Controller.

Octant is a great tool that provides a nice representation of how the different k8s objects are related each other. If we click on our hackazon service and go to the Resource Viewer option this is the graphical view of services, replicaset, ingress, deployment, pods… etc.

Resource viewer of the hackazon service displayed from Octant UI

Now let’s move to the AKO piece. As mentioned AKO will act as an ingress controller and it should translate the resources of kind Ingress into the corresponding external Service Engine (Data Path) configuration that will cope with the traffic needs.

Exploring AKO Logs for Ingress Creation

If we look into the logs the AKO pod has producing we can notice the following relevant events has ocurred:

# A new ingress object is created. Attributes such as hostname, port, path are passed in the API Request
2020-12-14T13:19:20.316Z        INFO    nodes/validator.go:237  key: Ingress/default/hackazon, msg: host path config from ingress: {"PassthroughCollection":null,"TlsCollection":null,"IngressHostMap":{"hackazon.avi.iberia.local":[{"ServiceName":"hackazon","Path":"/","Port":80,"PortName":"","TargetPort":0}]}}

# An existing VS object called S1-AZ1--Shared-L7-0 will be used as a parent object for hosting this new Virtual Service
2020-12-14T13:19:20.316Z        INFO    nodes/dequeue_ingestion.go:321  key: Ingress/default/hackazon, msg: ShardVSPrefix: S1-AZ1--Shared-L7-
2020-12-14T13:19:20.316Z        INFO    nodes/dequeue_ingestion.go:337  key: Ingress/default/hackazon, msg: ShardVSName: S1-AZ1--Shared-L7-0

# A new server Pool will be created 
2020-12-14T13:19:20.316Z        INFO    nodes/avi_model_l7_hostname_shard.go:37 key: Ingress/default/hackazon, msg: Building the L7 pools for namespace: default, hostname: hackazon.avi.iberia.local
2020-12-14T13:19:20.316Z        INFO    nodes/avi_model_l7_hostname_shard.go:47 key: Ingress/default/hackazon, msg: The pathsvc mapping: [{hackazon / 80 100  0}]
2020-12-14T13:19:20.316Z        INFO    nodes/avi_model_l4_translator.go:245    key: Ingress/default/hackazon, msg: found port match for port 80

# The pool is populated with the endpoints (Pods) that will act as pool members for that pool. 
2020-12-14T13:19:20.316Z        INFO    nodes/avi_model_l4_translator.go:263    key: Ingress/default/hackazon, msg: servers for port: 80, are: [{"Ip":{"addr":"10.34.1.5","type":"V4"},"ServerNode":"site1-az1-k8s-worker02"},{"Ip":{"addr":"10.34.1.6","type":"V4"},"ServerNode":"site1-az1-k8s-worker02"},{"Ip":{"addr":"10.34.2.6","type":"V4"},"ServerNode":"site1-az1-k8s-worker01"}]
2020-12-14T13:19:20.317Z        INFO    objects/avigraph.go:42  Saving Model :admin/S1-AZ1--Shared-L7-0


# The IP address 10.10.25.46 has been allocated for the k8s ingress object
2020-12-14T13:19:21.162Z        INFO    status/ing_status.go:133        key: admin/S1-AZ1--Shared-L7-0, msg: Successfully updated the ingress status of ingress: default/hackazon old: [] new: [{IP:10.10.25.46 Hostname:hackazon.avi.iberia.local}]


Exploring Ingress realization at AVI GUI

Now we can explore the AVI Controller to see how this API calls from the AKO are being reflected on the GUI.

For insecure ingress objects, AKO uses a sharding scheme, that means some configuration will be shared across a single object aiming to save public IP addressing space. The configuration objects that are created in SE are listed here:

  • A Shared parent Virtual Service object is created. The name is derived from –Shared-L7-. In this case cluster name is set in the values.yaml file and corresponds to S1-AZ1 and the allocated ID is 0.
    • A Pool Group Object that contains a single Pool Member. The Pool Group Name is derived also from the cluster name <cluster_name>–hostname
    • A priority label that is associated with the Pool Group with the name host/path. In this case hackazon.avi.iberia.local/
    • An associated DataScript object to interpret the host/path combination of the incoming request and the pool will be chosen based on the priority label

You can check the DataScript automatically created in Templates > Scripts > DataScript. The content is showed bellow. Basically it extracts the host and the path from the incoming http request and selects the corresponding pool group.

host = avi.http.get_host_tokens(1)
path = avi.http.get_path_tokens(1)
if host and path then
lbl = host.."/"..path
else
lbl = host.."/"
end
avi.poolgroup.select("S1-AZ1--Shared-L7-0", string.lower(lbl) )

By the way, note that the Shared Virtual object is displayed in yellow. The reason behind that color is because this is a composite health status obtained from several factors. If we hover the mouse over the Virtual Service object we can see two factors that are influencing this score of 72 and the yellow color. In that case there is a 20 points penalty due to the fact this is an insecure virtual service and also a decrement of 5 related to resource penalty associated with the fact that this is an very young service (just created). This metrics are used by the system to determine the optimal path of the traffic in case there are different options to choose.

Let’s create a new ingress using the following YAML file. This time we will use the kuard application. The content of the yaml file that defines the Deployment, Service and Ingress objects is showed below:

apiVersion: apps/v1
kind: Deployment
metadata:
  name: kuard
  labels:
    app: kuard
spec:
  replicas: 3
  selector:
    matchLabels:
      app: kuard
  template:
    metadata:
      labels:
        app: kuard
    spec:
      containers:
        - image: gcr.io/kuar-demo/kuard-amd64:1
          name: kuard
          ports:
            - containerPort: 8080
              name: http
---
apiVersion: v1
kind: Service
metadata:
  name: kuard
spec:
  selector:
    app: kuard
  ports:
  - port: 80
    targetPort: 8080
---
apiVersion: networking.k8s.io/v1beta1
kind: Ingress
metadata:
  name: kuard
  labels:
    app: kuard
spec:
  rules:
    - host: kuard.avi.iberia.local
      http:
        paths:
        - path: /
          backend:
            serviceName: kuard
            servicePort: 80

Once applied using the kubectl -f apply command we can see how a new Pool has been created under the same shared Virtual Service object

As you can see the two objects are sharing the same IP address. This is very useful to save public IP addresses. The DataScript will be in charge of routing the incoming requests to the right place.

Last verification. Let’s try to resolve the hostnames using the integrated DNS in AVI. Note how both querys resolves to the same IP address since we are sharing the Virtual Service object. There are other options so share the parent VS among the different ingress services. The default option is using hostname but you can define a sharding scheme based on the namespace as well.

dig hackazon.avi.iberia.local @10.10.25.40 +noall +answer
  hackazon.avi.iberia.local. 5    IN      A       10.10.25.46

dig kuard.avi.iberia.local @10.10.25.40 +noall +answer
  kuard.avi.iberia.local. 5    IN      A       10.10.25.46

The final step is to open a browser and check if our applications are actually working. If we point our browser to the FQDN at http://hackazon.avi.iberia.local we can see how the web application is launched.

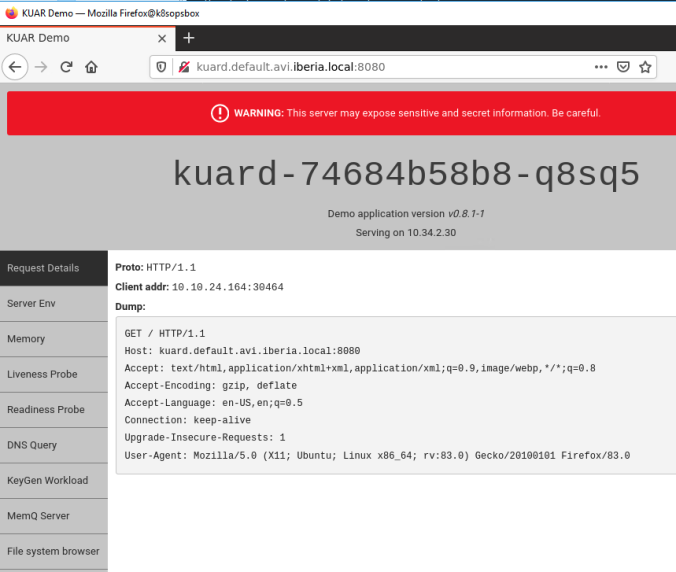
We can do the same for the other application by pointing at http://kuard.avi.iberia.local

Note that the browsing activity for both applications that share the same Virtual Service construct will appear under the same Analytics related to the S1-AZ1–Shared-L7-0 parent VS object.

If we need to focus on just one of the applications we can filter using, for example, Host Header attribute the Log Analytics ribbon located at the right of the Virtual Services > S1-AZ1–Shared-L7-0 > Logs screen.

If we click on the hackazon.avi.iberia.local Host we can see all hackazon site related logs

That’s all for now for the insecure objects. Let’s move into the next section to explore the secure ingress services.

AVI for K8s Part 3: Deploying AVI K8s LoadBalancer Type Services

Creating first LoadBalancer Object

Once the reachability is done now it’s time to create our first kubernetes Services. AKO is a Kubernetes operator implemented as a Pod that will be watching the kubernetes service objects of type Load Balancer and Ingress and it will configure them accordingly in the Service Engine to serve the traffic. Let’s focus on the LoadBalancer service for now. A LoadBalancer is a common way in kubernetes to expose L4 services (non-http) to the external world.

Let’s create the first service using some kubectl imperative commands. First we will create a simple deployment using kuard which is a popular app used for testing and will use a container image as per the kubectl command below. After creating the deployment we can see k8s starting the pod creation process.

kubectl create deployment kuard --image=gcr.io/kuar-demo/kuard-amd64:1
deployment.apps/kuard created

kubectl get pods
 NAME                    READY   STATUS       RESTARTS   AGE
 kuard-74684b58b8-hmxrs    1/1   Running      0          3s

As you can see the scheduler has decided to place the new created pod in the worker node site1-az1-k8s-worker02 and the IP 10.34.1.8 has been allocated.

kubectl describe pod kuard-74684b58b8-hmxrs
 Name:         kuard-74684b58b8-hmxrs
 Namespace:    default
 Priority:     0
 Node:         site1-az1-k8s-worker02/10.10.24.162
 Start Time:   Thu, 03 Dec 2020 17:48:01 +0100
 Labels:       app=kuard
               pod-template-hash=74684b58b8
 Annotations:  <none>
 Status:       Running
 IP:           10.34.1.8
 IPs:
  IP:           10.34.1.8

Remember this network is not routable from the outside unless we create a static route pointing to the node IP address as next-hop. This configuration task is done for us automatically by AKO as explained in previous article. If we want to expose externally our kuard deployment, we would create a LoadBalancer service. As usual, will use kubectl imperative commands to do so. In that case kuard listen on port 8080.

kubectl expose deployment kuard --port=8080 --type=LoadBalancer

Let’s try to see what is happening under the hood debugging the AKO pod. The following events has been triggered by AKO as soon as we create the new LoadBalancer service. We can show them using kubectl logs ako-0 -n avi-system

kubectl logs ako-0 -n avi-system
# AKO detects the new k8s object an triggers the VS creation
2020-12-11T09:44:23.847Z        INFO    nodes/dequeue_ingestion.go:135  key: L4LBService/default/kuard, msg: service is of type loadbalancer. Will create dedicated VS nodes

# A set of attributes and configurations will be used for VS creation 
# including Network Profile, ServiceEngineGroup, Name of the service ... 
# naming will be derived from the cluster name set in values.yaml file
2020-12-11T09:44:23.847Z        INFO    nodes/avi_model_l4_translator.go:97     key: L4LBService/default/kuard, msg: created vs object: {"Name":"S1-AZ1--default-kuard","Tenant":"admin","ServiceEngineGroup":"S1-AZ1-SE-Group","ApplicationProfile":"System-L4-Application","NetworkProfile":"System-TCP-Proxy","PortProto":[{"PortMap":null,"Port":8080,"Protocol":"TCP","Hosts":null,"Secret":"","Passthrough":false,"Redirect":false,"EnableSSL":false,"Name":""}],"DefaultPool":"","EastWest":false,"CloudConfigCksum":0,"DefaultPoolGroup":"","HTTPChecksum":0,"SNIParent":false,"PoolGroupRefs":null,"PoolRefs":null,"TCPPoolGroupRefs":null,"HTTPDSrefs":null,"SniNodes":null,"PassthroughChildNodes":null,"SharedVS":false,"CACertRefs":null,"SSLKeyCertRefs":null,"HttpPolicyRefs":null,"VSVIPRefs":[{"Name":"S1-AZ1--default-kuard","Tenant":"admin","CloudConfigCksum":0,"FQDNs":["kuard.default.avi.iberia.local"],"EastWest":false,"VrfContext":"VRF_AZ1","SecurePassthoughNode":null,"InsecurePassthroughNode":null}],"L4PolicyRefs":null,"VHParentName":"","VHDomainNames":null,"TLSType":"","IsSNIChild":false,"ServiceMetadata":{"namespace_ingress_name":null,"ingress_name":"","namespace":"default","hostnames":["kuard.default.avi.iberia.local"],"svc_name":"kuard","crd_status":{"type":"","value":"","status":""},"pool_ratio":0,"passthrough_parent_ref":"","passthrough_child_ref":""},"VrfContext":"VRF_AZ1","WafPolicyRef":"","AppProfileRef":"","HttpPolicySetRefs":null,"SSLKeyCertAviRef":""}


# A new pool is created using the existing endpoints in K8s that represent # the deployment
2020-12-11T09:44:23.848Z        INFO    nodes/avi_model_l4_translator.go:124    key: L4LBService/default/kuard, msg: evaluated L4 pool values :{"Name":"S1-AZ1--default-kuard--8080","Tenant":"admin","CloudConfigCksum":0,"Port":8080,
"TargetPort":0,"PortName":"","Servers":[{"Ip":{"addr":"10.34.1.8","type":"V4"},"ServerNode":"site1-az1-k8s-worker02"}],"Protocol":"TCP","LbAlgorithm":"","LbAlgorithmHash":"","LbAlgoHostHeader":"","IngressName":"","PriorityLabel":"","ServiceMetadata":{"namespace_ingress_name":null,"ingress_name":"","namespace":"","hostnames":null,"svc_name":"","crd_status":{"type":"","value":"","status":""},"pool_ratio":0,"passthrough_parent_ref":"","passthrough_child_ref":""},"SniEnabled":false,"SslProfileRef":"","PkiProfile":null,"VrfContext":"VRF_AZ1"}

If we move to the Controller GUI we can notice how a new Virtual Service has been automatically provisioned

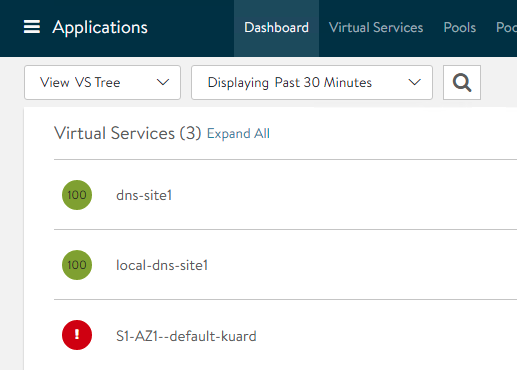
The reason of the red color is because the virtual service needs a Service Engine to perform its function in the DataPlane. If you hover the mouse over the Virtual Service object a notification is showed confirming that it is waiting to the SE to be deployed.

VS State whilst Service Engine is being provisioned

The AVI controller will ask the infrastructure cloud provider (vCenter in this case) to create this virtual machine automatically.

SE automatic creation in vSphere infrastructure

After a couple of minutes, the new Service Engine that belongs to our Service Engine Group is ready and has been plugged automatically in the required networks. In our example, because we are using a two-arm deployment, the SE would need a vnic interface to reach the backend network and also a fronted vnic interface to answer external ARP requests coming from the clients. Remember IPAM is one of the integrated services that AVI provides so the Controller will allocate all the needed IP addresses automatically on our behalf.

After some minutes, the VS turns intro green. We can expand the new VS to visualize the related object such as the VS, the server pool, the backend network and the k8s endpoints (pods) that will be used as members of the server pool. Also we can see the name of the SE in which the VS is currently running.

As you probably know, a deployment resource has an associated replicaset controller that is used, as its name implies, to control the number of individual replicas for a particular deployment. We can use kubectl commands to scale in/out our deployment just by changing the number or replicas. As you can guess our AKO needs to be aware of any changes in the deployment so this change should be reflected accordingly in the AVI Virtual Server realization at the Service Engines. Let’s scale-out our deployment.

kubectl scale deployment/kuard --replicas=5
 deployment.apps/kuard scaled

This will create new pods that will act as endpoints for the same service. The new set of endpoints created become members of the server pool as part of the AVI Virtual Service object as it is showed below in the graphical representation

Virtual Service of a LoadBalancer type application scaling out

AVI as DNS Resolver for created objects

The DNS is another integrated service that AVI performs so, once the Virtual Service is ready it should register the name against the AVI DNS. If we go to Applications > Virtual Service > local-dns-site1 in the DNS Records tab we can see the new DNS record added automatically.

If we query the DNS asking for kuard.default.avi.iberia.local

dig kuard.default.avi.iberia.local @10.10.25.44 +noall +answer
 kuard.default.avi.iberia.local. 5 IN    A       10.10.25.43

In the same way, if we scale-in the deployment to zero replicas using the same method described above, it should have also an effect in the Virtual Service. We can see how it turns again into red and how the pool has no members inasmuch as no k8s endpoints are available.

Virtual Service representation when replicaset = 0

And hence if we query for the FQDN, we should receive a NXDOMAIN answer indicating that the server is unable to resolve that name. Note how a SOA response indicates that the DNS server you are querying is authoritative for this particular domain though.

 dig nginx.default.avi.iberia.local @10.10.25.44
 ; <<>> DiG 9.16.1-Ubuntu <<>> kuard.default.avi.iberia.local @10.10.25.44
 ;; global options: +cmd
 ;; Got answer:
 ;; ->>HEADER<<- opcode: QUERY, status: NXDOMAIN, id: 59955
 ;; flags: qr aa rd; QUERY: 1, ANSWER: 0, AUTHORITY: 1, ADDITIONAL: 1
 ;; WARNING: recursion requested but not available
 ;; OPT PSEUDOSECTION:
 ; EDNS: version: 0, flags:; udp: 512
 ;; QUESTION SECTION:
 ;nginx.default.avi.iberia.local.        IN      A
 ;; AUTHORITY SECTION:
 kuard.default.avi.iberia.local. 30 IN   SOA     site1-dns.iberia.local. [email protected]. 1 10800 3600 86400 30
 ;; Query time: 0 msec
 ;; SERVER: 10.10.25.44#53(10.10.25.44)
 ;; WHEN: Tue Nov 17 14:43:35 CET 2020
 ;; MSG SIZE  rcvd: 138

Let’s scale out again our deployment to have 2 replicas.

kubectl scale deployment/kuard --replicas=2
 deployment.apps/kuard scale

Last, let’s verify if the L4 Load Balancing service is actually working. We can try to open the url in our preferred browser. Take into account your configured DNS should be able to forward DNS queries for default.avi.iberia.local DNS zone to success in name resolution. This can be achieved easily by configuring a Zone Delegation in your existing local DNS.

Exploring AVI Analytics

One of the most interesting features of using AVI as a LoadBalancer is the rich analytics the product provides. A simple way to generate synthetic traffic is using the locust tool written in python. You need python and pip3 to get locust running. You can find instructions about locust installation here. We can create a simple file to mimic user activity. In this case let’s simulate users browsing the “/” path. The contents of the locustfiel_kuard.py would be something like this.

import random
 from locust import HttpUser, between, task
 from locust.contrib.fasthttp import FastHttpUser
 import resource
 resource.setrlimit(resource.RLIMIT_NOFILE, (9999, 9999))
 class QuickstartUser(HttpUser):
    wait_time = between(5, 9)
 @task(1)
    def index_page(self):
       self.client.get("/")

We can now launch the locust app using bellow command line. This generate traffic for 100 seconds sending GET / requests to the URL http://10.10.25.43:8080. The tool will show some traffic statistics in the stdout.

locust -f locustfile_kuard.py --headless --logfile /var/local/locust.log -r 100 -u 200 --run-time 100m --host=http://10.10.25:43:8080

In order to see the user activity logs we need to enable the Non-significant logs under the properties of the created S1-AZ1–default-kuard Virtual Service. You need also to set the Metric Update Frequency to Real Time Metrics and set to 0 mins to speed up the process of getting activity logs into the GUI.

Analytics Settings for the VS

After this, we can enjoy the powerful analytics provided by AVI SE.

Logs Analytics for L4 Load Balancer Virtual Service

For example, we can diagnose easily some common issues like retransmissions or timeouts for certain connections or some deviations in the end to end latency.

We can also see how the traffic is being distributed accross the different PODs. We can go to Log Analytics at the right of the screen and then if we click on Server IP Address, you get this traffic table showing traffic distribution.

Using Analytics to get traffic distribution accross PODs

And also how the traffic is evolving across the time.

Analytics dashboard

Now that we have a clear picture of how AKO works for LoadBalancer type services, let’s move to the next level to explore the ingress type services.

© 2025 SDefinITive

Theme by Anders NorenUp ↑